Showing posts with label Decorating. Show all posts

Tuesday, April 19, 2011

Master Bedroom Makeover - Finished!


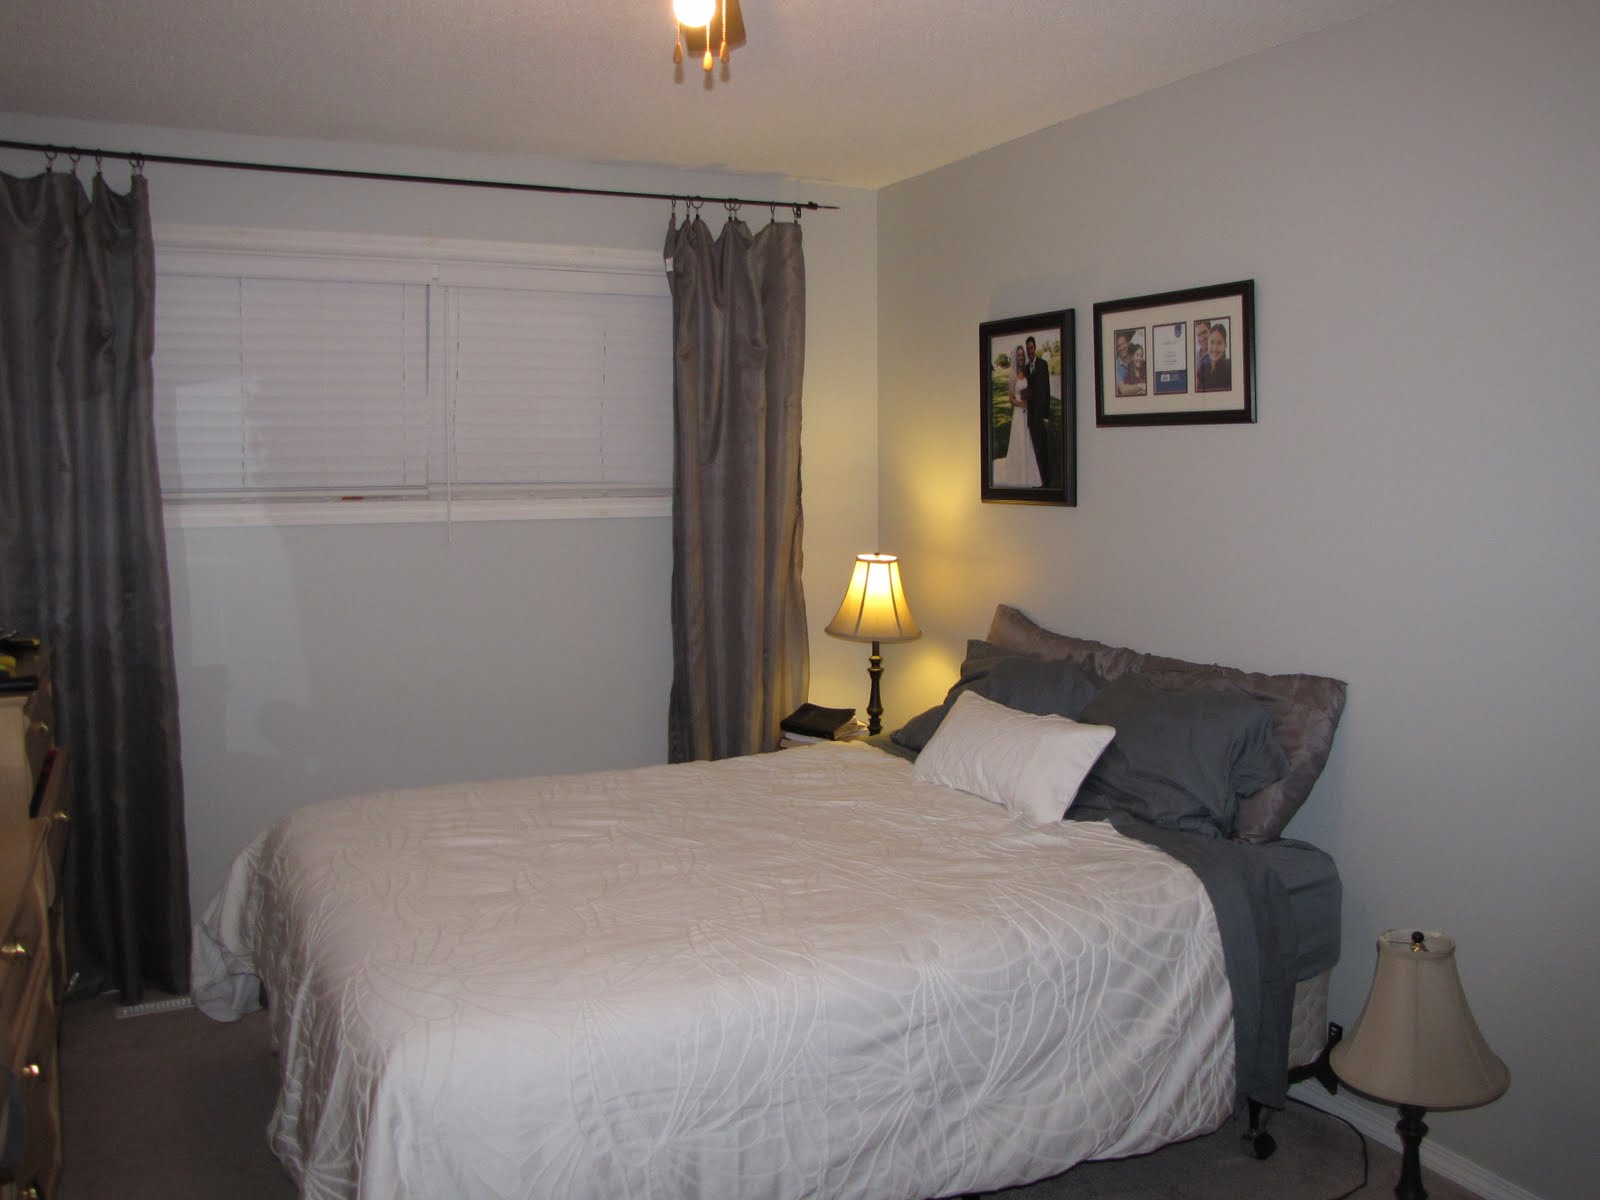
I am beyond thrilled to finally be finished the master bedroom makeover. I am so, so, so happy with the results! I was really going for a peaceful, calming, & restful feeling, and I think I've achieved that. Here are some before & after shots for you.

Before (Right after we first moved in...green paint with no curtains, mismatched bedding, and makeshift nightstands)


Before x2: (makeshift curtains I sewed out of sheets, nasty purplish-brownish paint colour I unfortunately picked out, new bedding)

After:


A few details:

Wall Colour: Beauti-tone paint colour matched to Benjamin Moore Moonshine

1) Micro gel duvet from Quilts Etc. to replace quilts & comforter
2) White duvet cover from Quilts Etc. (this was our biggest splurge - our Christmas present to each other this last year! It was actually on a good sale when we bought it, though.)
3) Bamboo sheet set from Quilts Etc. in Blue Sea (also a bit of a splurge)
4) Grey runner at foot of bed - made out of discount bedsheets from Walmart (from a failed attempt of making sheets into curtains)
5) Nightstands - $5 each from a garage sale. See the nightstand makeover here
6) Dresser - $25 second hand purchase. See the dresser makeover here
7) Round hurricane thingy on dresser - $10 from Winners
8) Art above bed - $12 each from Walmart
9) Curtains - from Walmart
10) Chandelier - from Rona (around $80)


*Linking up to Raising Homemakers*


*Linking up to We Did It Wednesdays


Tuesday, March 29, 2011

Dresser Makeover - Love It!


I think I may have discovered a new hobby - making over cheap furniture. I really, really, really wish I would have taken a better before and after picture. The ones I have just don't do it justice. Honestly, the difference is amazing. We bought this 9 drawer dresser for $25 from the people we bought our house from. It is cheap veneer and not very solid. It had gold handles and was quite the eye sore. After making over my cheap $5 pine nightstands, I decided to try my hand at a bigger project and tackle this dresser. I am beyond thrilled with the results because now our bedroom has "matching" furniture...2 nightstands and a dresser (all painted in Benjamin Moore's Decorator's White)! The white looks so good with the Moonshine (Benjamin Moore greyish blue paint colour), but it's hard to tell the true colours in the pictures.

If you want to know how to paint almost any piece of furniture, check out my instructions here.

Here's how it went down:
I saved a lot of money by spray painting the gold handles instead of replacing them. If you like the style of your old hardware, I highly recommend doing this. The spray paint only cost me $10. I used Rustoleum metallic spray paint in satin nickel. Buying new hardware would have cost at least $5 per handle for $45 total instead of $10. We had looked for new hardware, but the holes were a weird space apart and we could only find one style that was the right size, and it was ugly. So, instead of having to fill in the holes and then sand it down, I opted for spray painting the original handles. I am very happy with the results!

I did the usual sand, oil primer/sealer x2, Decorator's White latex paint x2. That's really all there is to it. For painting the mirror, I used painter's tape to tape newspaper to cover the whole thing. This worked great and left me with clean lines.


A close up of the drawers and handles:


Here's what our master bedroom currently looks like: (umm...ignore the bad bed-making job!). Now I just need to hang a few prints above the bed and hang up our wedding pictures!


Quite a difference from before! To see the very first before picture, you'll have to check out the tour of my home and find the master bedroom (a greenish colour before!)


Once I have the master bedroom completed, I will do a post and a breakdown of the decorating process. And yes..it is a process!

*Linking up to Blue Cricket Design show and tell
CreativeShareWednesdays


*Linking up to House of Hepworths

Wednesday, March 23, 2011

Nightstand Makeover

I bought these nightstands last summer at a garage sale for $5 each. I finally got around to painting them this past month. I love finding second hand items and making them over to suit our home. I can't wait for garage sale season to start! ;-)

Before:


After #1 (I painted the knobs white at first.)


After #2: Found some cheap brushed nickel knobs to use instead. I can always go back to the white if I change my mind.


Here's how I did it:

Step 1: Lightly sand nightstands with medium grit sandpaper. Then dust with a cloth.

Step 2: Prime with oil primer/sealer. Let dry. (Tip: Wear cheap disposable rubber gloves and cheap paintbrushes so that you can just toss it out later for an easier clean-up with oil paint.)

Step 3: Very lightly sand nightstands with very find grit sandpaper. Dust again.

Step 4: Apply a 2nd coat of oil primer/sealer. Let dry.

Step 5: Apply a coat of latex paint. (I used cheap paint colour matched to Benjamin Moore Decorator's White.). Let dry.

Step 6: Apply another thin coat of latex paint. Let dry completely before placing anything on it.


*Linking up to Raising Homemakers homemaking link-up*


Tuesday, February 15, 2011

Bedroom Makeover Progress - Curtains

First, I attempted to sew some curtains from some cheap sheets I bought (2 full sets for $19). I really liked hanging them high above the window. I did a terrible sewing job, and although I loved the gray (and the price tag!), the curtains ended up being too sheer for us. We need something that blocks out the light better in the summer.


So...off to the store I went to find some gray curtains. Unfortunately, I could not find gray ones quite long enough, so I settled for a pair that were a tad too short. These are a deeper gray and made out of shiny material. It was nearly impossible to iron out the wrinkles in them, which is kind of driving me crazy, but I am over it. I hate ironing too much to care anymore! I used one of the fitted sheets from my cheapo set as a makeshift box spring cover. So far I'm pretty happy with my choice of curtains. I also purchased 3 gray, white, and black pictures that I plan on hanging right over our bed. The wedding picture will move to another part of the room. I have been working on painting our nightstands this past week and put my first coat of Decorator's White on this morning. I hope to get the second coat on tonight and then I have to decide what to do about hardware. I am either going to buy new hardware for them, or preferably (to save money) paint the wooden ones white or black.


Friday, January 28, 2011

Bedroom Makeover - First Look at Paint

I put Little Bittles to bed around 7 last night and got straight to work. I had already taped the room during the day, so that saved me a bit of time. After the first wall, I was already sick of painting, but I was determined to finish before I went to bed. I finished around 10:30 or so, and we slept in the spare room so we didn't have to inhale paint fumes all night. Here's how our room has changed over the past year.

This is what it looked like when we first got moved in and set up. The paint was a green that I really did not care for. We didn't have any curtains for a long time.


Determined to get rid of the green paint, I made a rush decision and picked a greyish-taupey-pinkish-brownish-I really-don't-know-what-colour-it-is-colour. My husband pretty much hated it from the beginning, while I tried to convince myself that I actually liked it. Actually, in this picture it looks better than it did in person. I also sewed up some make-shift curtains made from bedsheets to cover up the windows and keep it darker in summer.


And here it is after Moonshine (the paint colour, of course!) did it's magic! I rearranged the bed to go against a different wall. We've had issues with arranging our furniture because of the location of the closet and size of the room. I think this new arrangement might work/look better. At first, I wasn't too sure about the new paint colour as I thought it was a little too blue for my taste. It is a light grey with blue and sometimes green undertones. In this picture, it's at its "blueist". After making the bed and arranging things, I have decided that I LOVE it! I know this sounds crazy, but I feel like I can just breathe better in there. It's a totally different feel than the pinky brown colour. This is much more calming, fresh, and serene. The space definitely feels bigger, which is what I was going for. It's not finished yet, but this gives you an idea of the look I'm going for.

Now...I need to decide on curtains and what colour to paint the nightstands and dresser (eventually). Thoughts? Advice? I'm loving the way the paint colour looks with the white trim, so I'm leaning toward painting the nightstands white. I'm thinking about going for white floor-length curtains, too, except I need something that will block out the light better. Maybe chocolate brown, black, or blue?? Oh..and silly Bittles struck a pose and cheesy smile when I brought out the camera! She's too stinkin' cute!


Related Posts Plugin for WordPress, Blogger...