Thursday, March 31, 2011

Schedule Adjustments

My head is spinning. I feel like I have a million and one things to do but just can't seem to get any of my projects done. In my home management binder, I have a cleaning schedule that was working really good for me. Notice I said was. Here is the beauty of life. As kids get older, your family dynamics change. Your needs change. I am finding that having a toddler is much different than having a baby. Much different! And I am finding I am way busier and probably more tired now than I was with a baby. Don't get me wrong - I love it! I love having a busy toddler. Yes, it's busy, but it is SO much fun! Of course there are hard moments, hard days, but the joy in having a little one outweighs all the trials. Now...where was I. Oh yes, schedule adjustments.
So, I've decided to tweak my cleaning, projects, and laundry schedule. There probably won't be any earth-shattering changes, but I am looking for more efficiency. And yes, I'm still trying to get on some sort of daily schedule. Here is my proposed new weekly schedule. I hope this makes sense.

Basic Weekly Schedule
*Each day immediately after breakfast, do a quick 15 minute whole house tidy. Go from room to room making beds, putting things away, quick wipe of main bathroom, clean up breakfast. Do a whole house quick tidy right before bed, too.*

Mondays
Basic Cleaning: Floors (vacuum & mop)
Laundry: 1 load darks, 1 load lights, 1 load delicates (dress clothes)
Projects/Errands: grocery shopping, bake cookies/treats

Tuesdays
Basic Cleaning: Clean tub/shower, thorough bathroom clean
Laundry: 1 load dark bedding, 1 load Ellie clothes, 1 load kitchen/dishcloths
Projects: 1st Tuesday of Month - photos
2nd Tuesday of Month - baby/memory books
3rd Tuesday of Month - Home management binder
4th Tuesday of Month - Ellie's closet

Wednesdays
Basic Cleaning: Floors (up & down), Wipe couches, spot clean windows
Laundry: 1 load dark towels
Projects: 1st Wednesday of Month (every other month) - alternate window tracks & baseboards
2nd Wednesday of Month - Dust light fixtures
3rd Wednesday of Month - Kitchen cupboards

Thursdays
Basic Cleaning: Dust (including window sills), wipe dressers & bookshelves
Laundry: 1 load light towels
Projects: Baking (breads, buns, pita, make ahead meals (such as pizza pockets, pop tarts, etc.) )
Organizing projects

Fridays
Basic Cleaning: Floors, bathrooms, fridge, stove, microwave, washing machine, dryer
Laundry: none or miscellaneous (hand wash, delicates, etc.)
Projects: Menu planning, sewing, organizing, special projects

One more thing. Do you have a mile long list of projects like I do? I find that I seem to never accomplish anything off of that list. I read somewhere that it is better to pick just 3 projects to do, and do not attempt anything else until those 3 are done. So, I'm going to try that method. I have way more than 3 projects I'd like to do, but I'm going to try this strategy to see if I can actually accomplish even 1 thing for once! Ha ha. Here are my top 3 special projects to complete, in no particular order. I'll add my top 3 projects to my sidebar and switch them out as I (hopefully) complete them.

1) Make a his/hers keepsake "love box" (for love letters from my husband, cards, special notes)
2) Try sewing this ruffle skirt from old t-shirts
3) Hang up pictures in master bedroom

Italic

Tuesday, March 29, 2011

Dresser Makeover - Love It!


I think I may have discovered a new hobby - making over cheap furniture. I really, really, really wish I would have taken a better before and after picture. The ones I have just don't do it justice. Honestly, the difference is amazing. We bought this 9 drawer dresser for $25 from the people we bought our house from. It is cheap veneer and not very solid. It had gold handles and was quite the eye sore. After making over my cheap $5 pine nightstands, I decided to try my hand at a bigger project and tackle this dresser. I am beyond thrilled with the results because now our bedroom has "matching" furniture...2 nightstands and a dresser (all painted in Benjamin Moore's Decorator's White)! The white looks so good with the Moonshine (Benjamin Moore greyish blue paint colour), but it's hard to tell the true colours in the pictures.

If you want to know how to paint almost any piece of furniture, check out my instructions here.

Here's how it went down:
I saved a lot of money by spray painting the gold handles instead of replacing them. If you like the style of your old hardware, I highly recommend doing this. The spray paint only cost me $10. I used Rustoleum metallic spray paint in satin nickel. Buying new hardware would have cost at least $5 per handle for $45 total instead of $10. We had looked for new hardware, but the holes were a weird space apart and we could only find one style that was the right size, and it was ugly. So, instead of having to fill in the holes and then sand it down, I opted for spray painting the original handles. I am very happy with the results!

I did the usual sand, oil primer/sealer x2, Decorator's White latex paint x2. That's really all there is to it. For painting the mirror, I used painter's tape to tape newspaper to cover the whole thing. This worked great and left me with clean lines.


A close up of the drawers and handles:


Here's what our master bedroom currently looks like: (umm...ignore the bad bed-making job!). Now I just need to hang a few prints above the bed and hang up our wedding pictures!


Quite a difference from before! To see the very first before picture, you'll have to check out the tour of my home and find the master bedroom (a greenish colour before!)


Once I have the master bedroom completed, I will do a post and a breakdown of the decorating process. And yes..it is a process!

*Linking up to Blue Cricket Design show and tell
CreativeShareWednesdays


*Linking up to House of Hepworths

Monday, March 28, 2011

Crockpot Beef Stroganoff

This recipe is SO easy to throw together in the morning to let cook all day. This recipe is a definite hit with our family!

Crockpot Beef Stroganoff - adapted from Kraft foods here
Serves 6-8

2 lbs beef stew meat, cut into 1 inch cubes
454 grams sliced mushrooms
1 medium onion, minced
1 clove garlic, minced
1 1/2 cups beef broth
2 tsp paprika
1 tsp salt
1 cup sour cream
4 Tbsp flour (depends on how much broth you used. Start with 2 Tbsp flour, and go from there.)
1 Tbsp dijon mustard
1 large package of egg noodles
2 Tbsp chopped fresh parsley

Place meat, mushrooms, onions, and garlic in crockpot. Add broth, paprika, and salt. Cover and cook on low for 7-8 hours until meat is tender and cooked. Mix sour cream, flour, and mustard. Stir into crockpot, cover, and then cook an additional 15 minutes to thicken. Add more flour as needed to thicken. (Meanwhile, cook the egg noodles.) Toss noodles with chopped parsley. Spoon meat mixture on top and garnish with more parsley.


Linking up to Raising Homemakers
nap time creations

Sunday, March 27, 2011

Menu Plan Monday (March 28, 2011)

Last week's crockpot beef stroganoff was a big success. It's so quick to throw together, which is what I love the most about it. Even our picky toddler loved it. I'm really working on getting more of my recipes with pictures up on my blog, but it will take some time. I planned fairly simple recipes for this week with lots of leftovers. My grocery challenge isn't go so well right now. Is it just me, or have grocery prices increased a lot lately? Lettuce I used to pay three dollars for is now five dollars. Just one more reason, I can't wait for spring to arrive so I can plant a garden!

Sunday, March 27
Breakfast: Oatmeal and fruit
Lunch: going out
Supper: Italian Soup (from freezer), omelets

Monday, March 28
Breakfast: Homemade bacon n' egg mcmuffins
Lunch: Baked pasta with mushrooms & spinach (I'm going to invent my own), Caesar salad
Supper: Leftovers

Tuesday, March 29
Breakfast: Toast & fruit
Lunch: Leftovers or smoothies
Supper: Turkey rice casserole (recipe to come), steamed green beans

Wednesday, March 30
Breakfast: Oatmeal
Lunch: Leftovers or Grilled cheese
Supper: Leftovers

Thursday, March 31
Breakfast: Banana chip muffins (toast for me - can't stand bananas!)
Lunch: Tuna salad pitas
Supper: Shepherd's pie (NEW), tossed salad

Friday, April 1
Breakfast: Leftover muffins
Lunch: Leftovers
Supper: Leftovers

Saturday, April 2
Breakfast: Buttermilk pancakes
Lunch: Leftovers or simple pasta
Supper: Meatloaf, Two-tone mashed potato crisp (NEW)

*Alternative quick meals for the week: Frozen pizza or Black bean chili soup*
Desserts/Baking/Other
Honey whole wheat bread
Homemade pitas
Homemade salsa (recipe to come)
Banana chip muffins

*For more great meal ideas, visit Menu Plan Monday hosted by orgjunkie.com*

Thursday, March 24, 2011

52 Weeks of Organizing - Week 12

Dressers

Nightstand


This week I addressed the mess on our dressers and nightstands...Hmm...deja vu you say? Why yes, I did tackle this in a previous week. Here's the thing about clutter...it has a way of accumulating again if you don't stay on top of it. Please tell me I'm not the only one who has this problem. This is where piles tend to accumulate in our house, and it drives me crazy! When cleaning off our dressers I found three kleenex boxes. THREE! Why are they there? How did they get there? I do not know! I feel so much better now that the clutter is cleared off the surface. Thing is...we still have a problem. It's called junk drawers. Yep, a lot of that stuff ended up in the junk drawers. I hate junk drawers. They are driving me crazy. I could probably handle having 1 or 2 somewhat unorganized junk drawers, but 9 or 10?? Yipes! (and yes, yipes is a word.) I've got a lot of work to do. The good thing is that I'm almost done painting our 9 drawer dresser downstairs which will soon replace the 2 dressers currently in our bedroom. When the exchange happens, I'm determined to conquer junk drawers once and for all! For now, getting rid of surface clutter will have to do. Anyone else have a junk drawer problem like me? I think there is a reason why they call them junk drawers...probably because they contain mostly...junk.

*Linking up to 52 Weeks of Organizing Challenge*

Kommst (Cabbage) Borscht


This is one of my all-time favourite Mennonite dishes, adapted from my Great Grandmother's recipe. When you make the broth with soup bones, it makes for a very healthy dish!

Kommst (Cabbage) Borscht

2 pounds beef with soup bone (or use leftover chopped roast beef)

Splash of balsamic vinegar

12 cups cold water (or beef stock if not using soup bone)

4 cups chopped cabbage

1 carrot, sliced

1-2 celery stalks, sliced

1 large onion, chopped

small bunch of parsley

small bunch of dill

2 Bay leaves

salt and pepper to taste

1 large can of diced tomatoes (28 oz)

2-3 cups cubed potatoes

Directions: Place beef soup bone and water in large pot. Add a splash of balsamic vinegar. Bring to a boil and simmer for several hours; skim off foam occasionally. Remove soup bones, reserve broth, and cut off the meat into small pieces. Add beef, chopped cabbage, carrots, celery, onion, herbs, and spices. Bring to boil, add tomatoes, and then simmer for an hour or until veggies are cooked. Serve with a dollop of sour cream.

Wednesday, March 23, 2011

Nightstand Makeover

I bought these nightstands last summer at a garage sale for $5 each. I finally got around to painting them this past month. I love finding second hand items and making them over to suit our home. I can't wait for garage sale season to start! ;-)

Before:


After #1 (I painted the knobs white at first.)


After #2: Found some cheap brushed nickel knobs to use instead. I can always go back to the white if I change my mind.


Here's how I did it:

Step 1: Lightly sand nightstands with medium grit sandpaper. Then dust with a cloth.

Step 2: Prime with oil primer/sealer. Let dry. (Tip: Wear cheap disposable rubber gloves and cheap paintbrushes so that you can just toss it out later for an easier clean-up with oil paint.)

Step 3: Very lightly sand nightstands with very find grit sandpaper. Dust again.

Step 4: Apply a 2nd coat of oil primer/sealer. Let dry.

Step 5: Apply a coat of latex paint. (I used cheap paint colour matched to Benjamin Moore Decorator's White.). Let dry.

Step 6: Apply another thin coat of latex paint. Let dry completely before placing anything on it.


*Linking up to Raising Homemakers homemaking link-up*


Monday, March 21, 2011

Life is Fragile - A Miracle

We witnessed God's hand of miraculous protection this past weekend as our brother in law (who is also my husband's best friend) was in a very serious accident. His work truck hit a semi as the semi tried to cross a busy highway and cut right in front of him. Miraculously, he did not break any bones or suffer any life threatening injuries. Anyone who saw the picture of his truck knows just how much of a miracle it is that he is alive, not to mention doing fairly well, considering.
His sister got married the day after the accident, and we were all able to make it up there for the wedding, even our brother-in-law who was discharged from hospital the morning of the wedding.

It was an emotional weekend. Tears of sadness & tears of joy, feelings of fear & feelings of relief, prayers of pleading and prayers of praise. We were reminded again of how life is so fragile, so precious. A reminder that this is not the end. There is an eternity beyond this life. An eternity in heaven for those who place their faith in Christ. Priorities change. Suddenly work isn't so important, having a clean house, getting things painted and projects completed - It just doesn't matter. Family matters. Friends matter. And most importantly, faith matters. And not just any kind of faith. Faith in Christ, the true God. We are reminded that our life is not our own. We can do "everything right" to be safe and healthy and live a long time, and yet when God calls us home, He calls us home. There is nothing our brother-in-law could have done to stop this accident. He was not at fault and did not have time to stop. He had no control of the situation. God knew he'd be there to meet that semi right then and there. He knew that semi would cut right in front of him at that exact moment. Why, we do not know. But we know there's a reason.

Our brother-in-law is saved; he knows where he's going when he dies. Many of those who attended the wedding do not know where they are going, but they definitely heard the gospel. The name of the LORD was glorified at this wedding, and it was an awesome day as we witnessed our good friends wed before God, family, and friends. We heard the good news, we heard testimonies of God's grace and faithfulness. It was a very good day. At the request of the bride and groom, the good news was preached during the ceremony. Some might think it is not an appropriate time to share the message of the cross at a wedding. But as our dear friend and brother in Christ preached, there are 2 very important questions in life. The second most important one is who will you marry? But the most important question is...what will you do with the Jesus of the Bible? And so I ask you, my dear readers...what will you do with the Jesus of the Bible? There are only 2 choices; receive Him by faith or reject Him for all of eternity. I pray you know Him personally.

Today, I am grateful for God's hand of protection on our brother in law's life. I am grateful for family and friends. I am grateful that we had the privilege of attending our good friends' special wedding day. The day of the accident could have been a very different day. We could have lost our dear brother-in-law and friend in a moment. As a result, the wedding could have been a very different wedding. But God had a different plan. It was not his time to go, and we are so grateful for that. But the reality is that any one of us could go at any time. Don't think your life is your own. It is not. Only God knows the number of days He has already ordained for you to live. Be sure you know where you are going should your days be up today. Be 100% sure. It is the most important thing.

When a near-tragedy like this occurs, especially so close to home, it's like the Lord gently takes me by the shoulders and says to me, "Don't you see what's important? No...don't you see who is important. It's about people. It's about Me, your Saviour. It's about sharing the Good News with others. Don't keep the Good News to yourself. It's meant to be shared. Don't you see? You're not in control, but I am. Trust Me. Trust Me. Trust Me."

Join us for Gratituesday at Heavenly Homemakers!


P.S. Please take some time to pray for a relative of mine whose son has a rare and fatal metabolic disease (Her blog is on my sidebar under Rainbows and Earthquakes). He has either a serious virus or infection in his lungs right now. He and his family need your prayers.

Menu Plan Monday (March 21, 2011)

Last week I tried planning our breakfasts, too. It started out pretty good, but by the end of the week we were back to mostly toast again. My husband is never one to complain. He could eat toast every day for breakfast and tuna sandwiches for lunch every day and would never mention it. However, the one day that I made up some scrambled eggs with our toast last week, he exclaimed to me, "I love eggs! We should have these more often." My husband loves eggs? Who knew!? Then, yesterday we were talking about homemade egg mcmuffins and he thought those sounded awesome. So, I'm definitely inspired to widen our breakfast horizons some more. Sorry about the lack of recipe links this week - my husband is sick with the flu today so I'm in a hurry to post this today. I have a whole bunch of recipes I need to share on here yet, so hopefully I can get around to that in the next while.

Here's the plan for this week:

Sunday, March 20
Breakfast: We were in such a hurry to get to church we skipped breakfast
Lunch: Ate out subs
Supper: Visiting family

Monday, March 21
Breakfast: Toast and scrambled eggs
Lunch: Homemade whole wheat macaroni & cheese (recipe to come)
Supper: Leftover sweet & sour meatballs (from last week - in freezer), rice, green beans

Tuesday, March 22
Breakfast: Buttermilk pancakes, fruit
Lunch: Fettuccine in lemon caper sauce (recipe to come), Caesar salad
Supper: Crockpot beef stroganoff (NEW), egg noodles, mixed veggies

Wednesday, March 23
Breakfast: Oatmeal, fruit
Lunch: Leftovers
Supper: Leftover stroganoff & veggies

Thursday, March 24
Breakfast: Toast & scrambled eggs
Lunch: Pasta in creamy tomato sauce
Supper: Swiss steak (NEW), roasted potatoes and veggies

Friday, March 25
Breakfast: Homemade bacon & egg Mcmuffins (NEW)
Lunch: leftovers
Supper: Homemade pizza, Caesar salad

Saturday, March 26
Breakfast: Baked oatmeal (NEW), fruit
Lunch: Leftovers
Supper: Leftovers or something simple

Desserts/Baking/Other:
Rhubarb Crisp
Cookies (not sure what kind yet)

*For more great meal ideas, visit Menu Plan Monday hosted by orgjunkie.com*

Thursday, March 17, 2011

52 Weeks of Organizing - Week 11


This week I tackled the medicine cabinet/vitamins - Take 2. You may recall that I tackled the medicine cabinet 2 weeks ago. See this post here. However, I was not happy with the arrangement; it just wasn't working for me. So, here I am this week with a new and improved system for organizing all of our medicine, vitamins, and first aid supplies. It is now both organized and out of reach of our little toddler. Everything is also neatly labeled, so it should be easy to find what is needed. Here's how it went down:

1) First, I had a look at what I had and estimated how many containers I needed to buy. I picked up a couple cheap ones at Walmart. I already had most of the medicine organized into groups before this, so that made estimating the number of containers easier.
2) Next, I gathered everything into one place and figured out the best way to group things together.
3) Then, I put them into containers, making sure everything fit nicely and that I was happy with the arrangement.
4) Lastly, I took out my handy labeler and labeled away. This will make retrieval of what we need quick and easy.

Here are how the containers are labeled and organized:

1)Children & Thermometers
2) Pain Relief, Stomach, Heartburn
3) Cough, Cold, Flu, Sore Throat
4) Epipen, Allergy, Asthma, Eye Drops
5) Vitamins
6) Bandaids, Ointments, First Aid

Here are the before pictures: (some are from before I began 2 weeks ago)


Everything in one place, out of reach of children, organized & labeled. So much better!

*Linking up to 52 Weeks of Organizing Challenge here *

Ellie at 18 months


I'll be the first to admit that I'm terrible at keeping up with baby books, photo albums, and scrapbooks. I've almost completed her baby book for her first year, but time has a way of getting away on a person. So, here are a few things about our sweet Ellie at 18 months old that I hope to one day write down in her keepsake book. For now, I'll just blog it while it's on my mind.

Ellie at 18 months

Weight: almost 23 pounds
Height: about 33 inches long
Eyes: They have turned less blue and are more of a grey/green/blue right now. Not too sure what colour they are right now!

Favourite Security Object: Gerry the Giraffe and a plush flower blanket from G. Grandma K.
Favourite Colour: yellow (when we ask, "what colour is ___), the answer is always "yellow!")
Favourite Games: hide and seek, running, "stop and go", spinning, cramming inoto small spaces, doing anything Mommy or Daddy is doing (stirring, hammering, wiping tables, sweeping, unloading the dishwasher, etc.)
Favourite Foods: toast, creamy and cheesy pasta, milk, sweet potato fries, pineapple, oranges, cheeseburgers, and of course "choc-it" and "cookies". You were an extremely picky eater for awhile and would only eat grilled cheese and mac n' cheese for a long time. Mommy and Daddy were more stubborn (most days) than you, though, so you finally learned to expand your palate a little bit and are eating much better. There is still room for improvement :-)
Least Favourite Foods: mashed potatoes, peas, corn
Favourite Bedtime Book: Thankful Together
Favourite Phrases: "Pooh Coo", "See you later"
Favourite Chores: helping unload and load the dishwasher, cleaning up toys, helping with the laundry, stirring things in the kitchen

Sweet Ellie, at 18 months old, your vocabulary is exploding! You are learning things every day, and we are often amazed at what you pick up. For example, today Grandma brought over an ABCs and counting poster. After we counted to 10 a few times, you were suddenly filling in the numbers; we would say 1, you would say 2, we would say 3, you would say 4. I could hardly believe it! You understand so much and are getting to be a very good helper :-). Some of the ways you help Mommy are by unloading & loading the dishwasher (with help, of course), load and unload the laundry, bringing your clean laundry to your room, helping me in the kitchen by stirring and "pouring", cleaning up your toys, and dusting the tables with your own cloth. Mommy and Daddy are trying hard right now to teach you to obey and not throw temper tantrums. We are also trying to train you to sit still for awhile, so that you can sit better in church. Right now you are practicing this at home and also practicing "blanket time", playing on a special blanket with your toys for 20 minutes. You are climbing on everything! Once when Mommy wasn't looking, you were suddenly standing on top of the kitchen table! You climb up on the piano stool all by yourself to play the piano. You can climb into your high chair and pooh chair all by yourself. Nothing is out of your reach! We are very surprised you have not tried climbing out of your crib yet. Pretty soon we want to try potty training again and maybe switch you to a toddler bed. You tried potty training a few months ago, but gave up after awhile. Lately you've been taking your potty out and sitting on it again, so Mommy thinks it's time to give it a go again. You love music and often ask me to turn on a cd by pointing to the cd player and asking, "push?". You even sing along to your lullaby cd and sing certain words at the right time; that's how well you know the songs. Lately, you've really been enjoying colouring on paper and often ask me if you can "colour? colour?" You really do not like going to the doctor and scream the entire time the doctor examines you. I can't really blame you - you've been poked and prodded far more than most year-and-a-half year olds!

At just over 18 months old, you have an about a 200 word vocabulary. Here are more of your commonly used words and phrases (in addition to your earlier words listed here at 15 months.) For the most part, you regularly use and also understand what these words/phrases mean*

63) is it?
64) there it is!
65) love you!
66) glasses
67) coming!
68) blessing (from her lullaby cd, she learned this one)
69) rocking
70) shirt
71) socks
72) pants
73)slippers
74) sorry
75) water
76) hungry
77) thirsty
78) ketchup
79) yogurt
80) carrots
81) tower
82) empty
83) kick it
84) Gerry (her stuffed giraffe that she is very much attached to)
85) tasty
86) stand up
87) sit down
88) sweep
89) cloth (coff)
90) teeth
91) close it
92) orange
93) brush
94) teeth
95) wash
96) bounce
97) stop
98) freeze ("feeze")
99) go
100) cold
101) ready
102) dolly
103) "night night"
104) "side" (for outside)
105) snow
106) Sierra (her cousin)
107) phone
108) hair
109) open
110) close
111) auntie
112) yes
113) fruit (often "frook")
114) boots
115) shoes
116) bib
117) walk
118) run
119) dizzy
120) hamburger
121) cheese
122) dance
123) pooh coo (her favourite phrase BY FAR right now!) - from a Winnie the Pooh Book. She says it all the time
124) "ann-nan-na" (this is how she refers to herself!)
125) "num num"
126) dog
127) kitty
128) helper
129) fries
130) see you later
131) juice
132) monkey
133) coffee (used to be "caw caw" but now is more closely resembles coffee)
134) chocolate ("choc-it")
135) sweet
136) Bible
137) breakfast
138) supper
139) blocks
140) morning
141) taco
142) colour
143) pretty good
144) mittens
145) jacket
146) watch
147) necklace
148) tickle
149) thanks
150) beep beep
151) honk honk
152) hug
153) high five
154) two
155) diaper
156) knock knock
157) tweet tweet
158) bonkers
159) silly
160) cockadoodledoo
161) oh NO!
162) thank you (" tank you")
163) birdie
164) touque (tooky)
165) meow (mau mau)
166) whoa
167) morning
168) grandma (gwah-ma)
169) tummy
170) ouch
171) keys
172) truck
173) horse
174) nay (horse sound)
175) fish
176) house
177) table
178) chair
179) banana ("banan")
180) head
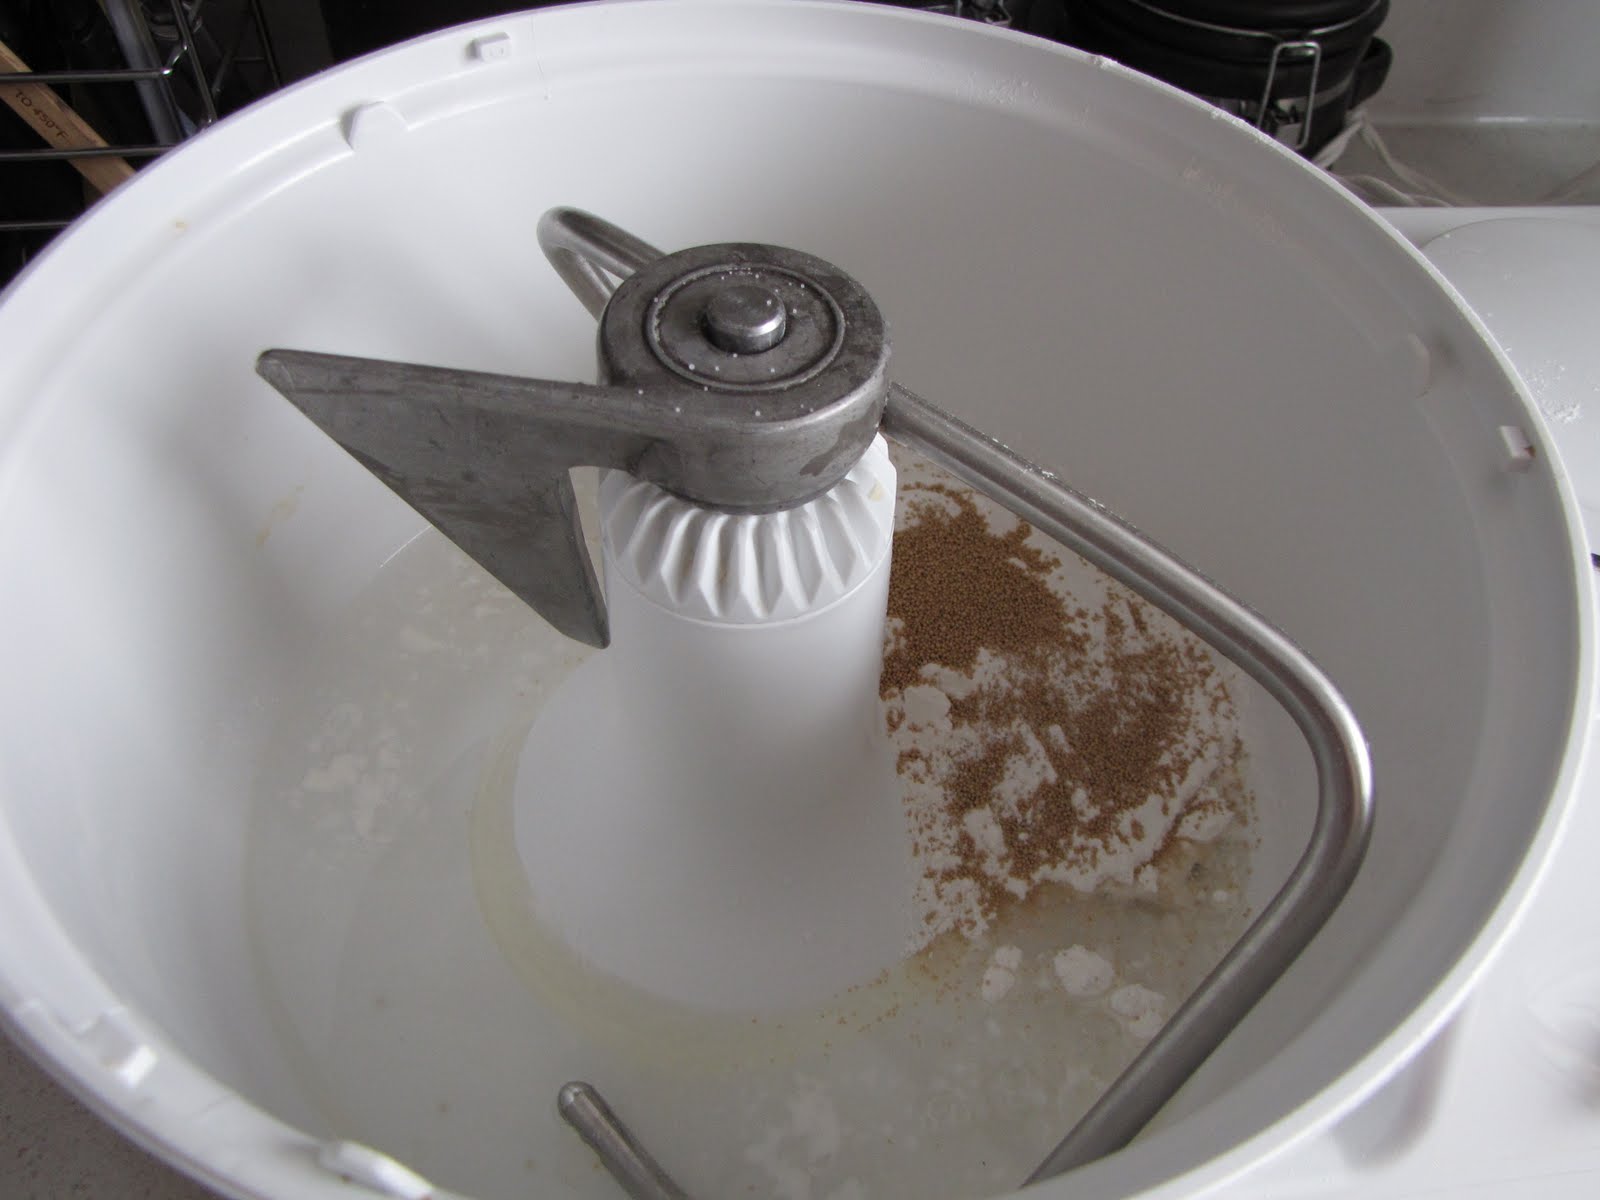
181) "poke it!" (especially with regards to punching down bread dough. LOL)
182) "tip it" (with regard to drinking out of a sippy cup)
183) bread ("bed")
184) toast
185) tv
186) story
187) "at-choo!" (when someone sneezes, she says this. Even in church. LOL)
188) zip it
189) toes
190) buttons

What a blessing you are, little girl! How we pray you might come to a saving faith at an early age. We love you, little Ellie!

Monday, March 14, 2011

Menu Plan Monday (March 14, 2011)

With Ellie getting sick last week & none of us sleeping well, I didn't follow last week's menu plan very closely. I can't even remember what we ended up eating - a lot of quick meals, and pasta with meat sauce from the freezer. So, this week has a few repeats. I'm going to try to plan breakfasts and lunches this week, and see how that works out. Usually our breakfasts consist of toast and fruit, but I thought I'd try a bit of variety this week. I try to keep breakfasts and lunches pretty simple, so that I'm not spending all day in the kitchen. The grocery challenge is still going all right. I'm making an effort to use up some things in our fridge this week, so that's the basis for my plan.

Sunday, March 13
Eating out & visiting family

Monday, March 14
Breakfast: Toast, fruit
Lunch: Spaghetti & meat sauce (using leftover meat sauce from freezer), steamed mixed veggies
Supper: Sweet potato fries, BLTs (make extra bacon for breakfast)

Tuesday, March 15
Breakfast: Scrambled eggs, bacon, fruit
Lunch: Pasta with lemon caper sauce, steamed mixed veggies
Supper: Beef borscht

Wednesday, March 16
Breakfast: Oatmeal, fruit
Lunch: Leftover pasta for me and Ellie
Supper: Leftover Beef borscht (you can never have too much borscht!) & cheese biscuits

Thursday, March 17
Breakfast: Toast & fruit
Lunch: Perogies & steamed veggies
Supper: Sweet & sour meatballs, rice, green beans

Friday, March 18
Breakfast: Buttermilk pancakes, fruit
Lunch: Leftovers
Supper: Leftovers

Saturday, March 19
Breakfast: Toast & fruit
Eating out the rest of the day!

Desserts/Baking/Other:
Big & soft ginger cookies (adapted a bit)

*For more great meal ideas, visit Menu Plan Monday hosted by orgjunkie.com*

Thursday, March 10, 2011

Fever and Rash

It's been another eventful week for our household. I'm pretty tired and trying to recover from the past 3 sleepless nights, so I'll make this short. Last Thursday, like I mentioned before, she had blood work and a check up done. The results from that test were about the same as before. Her neutrophils were very slightly higher than they have been, which is always nice to hear. I was my usual paranoid self at the clinic, using my disinfecting wipes on all points of contact. The thing about doctor's offices is, well, it's where sick people go. Pretty sure Ellie picked up some sort of bug while we were there (or at the hospital getting blood work done). Oh well. It happens, obviously.

So, on Sunday, I noticed Ellie had a low-grade fever. She had it on Monday as well. On Tuesday, however, she seemed to be better. On Wednesday, her fever came back a bit higher this time and I noticed a couple red spots on her back and tummy. Thankfully, I was able to get her in to see her pediatrician the same afternoon. By the time she saw the doctor that afternoon, she was covered in a rash. At that point, though, her fever was still not too bad, just hovering around 38 C. The pediatrician examined her and said he was pretty confident it was viral. He decided not to order tests since her fever wasn't too bad at that point. If it got to 38.5, then we had to come back. Well, at supper time, it was right around 38.5. We decided to wait it out a bit. Then around 2 a.m. she was just miserable, and her fever was 38.8. We went back and forth about whether we had to bring her in right then to the ER since her fever was above 38.5. However, we figured that waiting 6 hours until the morning was probably okay since the doctor had already seen her that day. For the 3rd night in a row, I eventually crashed with her on the couch. In the morning, praise the Lord, her fever and rash were basically gone! So, we ended up not having to take her back to the doctor for the myriad of blood/urine tests. She's seems quite a bit better today, so we are pretty confident it's just a virus of some sort. I'm in recovery mode today, mostly just chilling and cuddling on the couch with Ellie. We tried to have a little nap earlier today. She was playing in the bed, while I was attempting to nap. In a half-asleep state, I suddenly awoke with a start to Ellie peering at me and trying to poke her finger in my mouth. LOL. I feel like I'm still in a half-asleep state, so it's time to sign off.


Wednesday, March 9, 2011

How to Make Homemade Pita Pockets

I love this recipe for homemade pita pockets/flatbread. Here's a step-by-step guide to making homemade pita bread. This recipe yields 6-8 pitas.

Pita Bread

Ingredients:
1 cup warm water
1 tbsp oil
2 tsp sugar
1 tsp salt
3 cups flour
1 1/2 tsp yeast

Step 1: Combine 1 cup warm water, 1 Tbsp oil, 1 tsp salt, and 2 tsp of sugar in a large bowl (I use my Bosch).


Step 2: Add 1 cup flour (use white or whole wheat) and 1 1/2 tsp yeast and mix.


Step 3: Slowly add an additional 2 cups (approximately) of flour and knead for a few minutes to make a soft dough. You may need slightly less or more flour to make a soft dough. It should look something like this. I used a little too much flour this time.


Step 4: Place into an oiled bowl, lightly oil the top, cover with plastic wrap and a tea towel. Let rise for about an hour (until almost doubled). I always let my breads rise in the oven with the oven light on.
Step 5: Punch dough down and then divide into 6-8 equal portions.

Step 6: On a lightly floured surface, roll each section out into a fairly thin circle about 6 inches wide. Then, lightly cover the rolled out circles with a tea towel and let rise for another 30 minutes or until slightly puffy.
This is what my pitas look like after I've let them rise the second time. You can see they don't rise very much. They are only slightly puffed up.
Step 7: Place on a wire rack (you can probably use one like you use for cooling things. I use one that is for bacon, I think) and bake 2 at a time in 500 F oven for only about 4-5 minutes just until they start to lightly brown. Watch them very closely. You don't want them to overbake or they won't be pliable. You can turn them half way through, but you don't have to. I usually don't.
Step 8: Immediately wrap the pitas in a damp tea towel. This will help them be soft and pliable. Here's what one of mine looked like after it came out of the oven.


You can keep these on the counter for a few days, or keep them a bit longer in the fridge. Or, you can freeze them, which is what I do if I'm making them ahead of time. Just warm them up a bit before using to make them more pliable. There are many uses for pita bread. Here are just a few ways we use it:
  • Cut in half, carefully open up to create a pita pocket and fill with your favourite sandwich fillings. We like Sweet & Tangy BBQ Chicken & Coleslaw pitas.
  • Use the flatbread to make individual pizzas. Just spread pizza sauce and then add your favourite toppings on top. Bake at 400 F or so for about 8 minutes until cheese is melted. Check out the pita chip link below to see a picture of our flatbread pizzas.
  • Cut each pita into wedges and make homemade baked pita chips like we did here. Serve them with hummus.
Once you get the hang of it, these are pretty simple to make and are so much cheaper than the store bought versions. Plus, they taste WAY better too, in my opinion. Enjoy!

*Linking up to Raising Homemakers*


Related Posts Plugin for WordPress, Blogger...